 McKenna Hogan
3D Rendering Stages: Understanding the 3D Process
The use of 3D renderings is necessary in the development, pre-sell or pre-leasing stages of multifamily, senior living and many other industries. The...
.jpg)
Commissioning a 3D rendering project is a bit different than other types of content creation.
Unlike, let’s say, a photo shoot, 3D renderings require much more back and forth between the client and the 3D artist to get the best end result for your property—which means knowing a lot about what you want and how you want it.
To better understand the first step to reaching your desired end goal, below are a few ways to help decide on the best camera angles for your development.
Before even inquiring about a 3D rendering project, it’ll be beneficial to know exactly what goes into it—and what part you will be playing in the process.
These are the main steps in creating a 3D rendering.
Clients need to understand the steps that go into creating a 3D rendering to better prepare for outlining the finished product.
Below, we will cover the first step in the rendering process, determining the best camera angles for your project.
Figuring out an image's best camera angle, or perspective, is super important to the final project. This is because it’s often hard to make significant updates once the rendering process has started.
The first thing to consider will be dependent on what the location of the image is.
For instance, an exterior shot will have a different angle that fits best as opposed to the interior of a property. The reason there is a difference, according to LCP360 3D Project Manager Rayhanna Guillen, is that different locations require different emotions.
For example, if you’re creating an exterior of a multifamily community, you have to consider aspects such as the lighting in the sky, the weather, surrounding architectural components, etc.
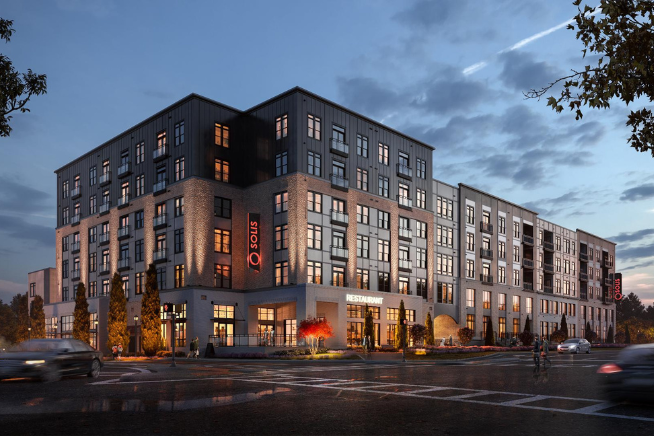
Below are a few examples of exterior 3D renderings with various viewpoints.
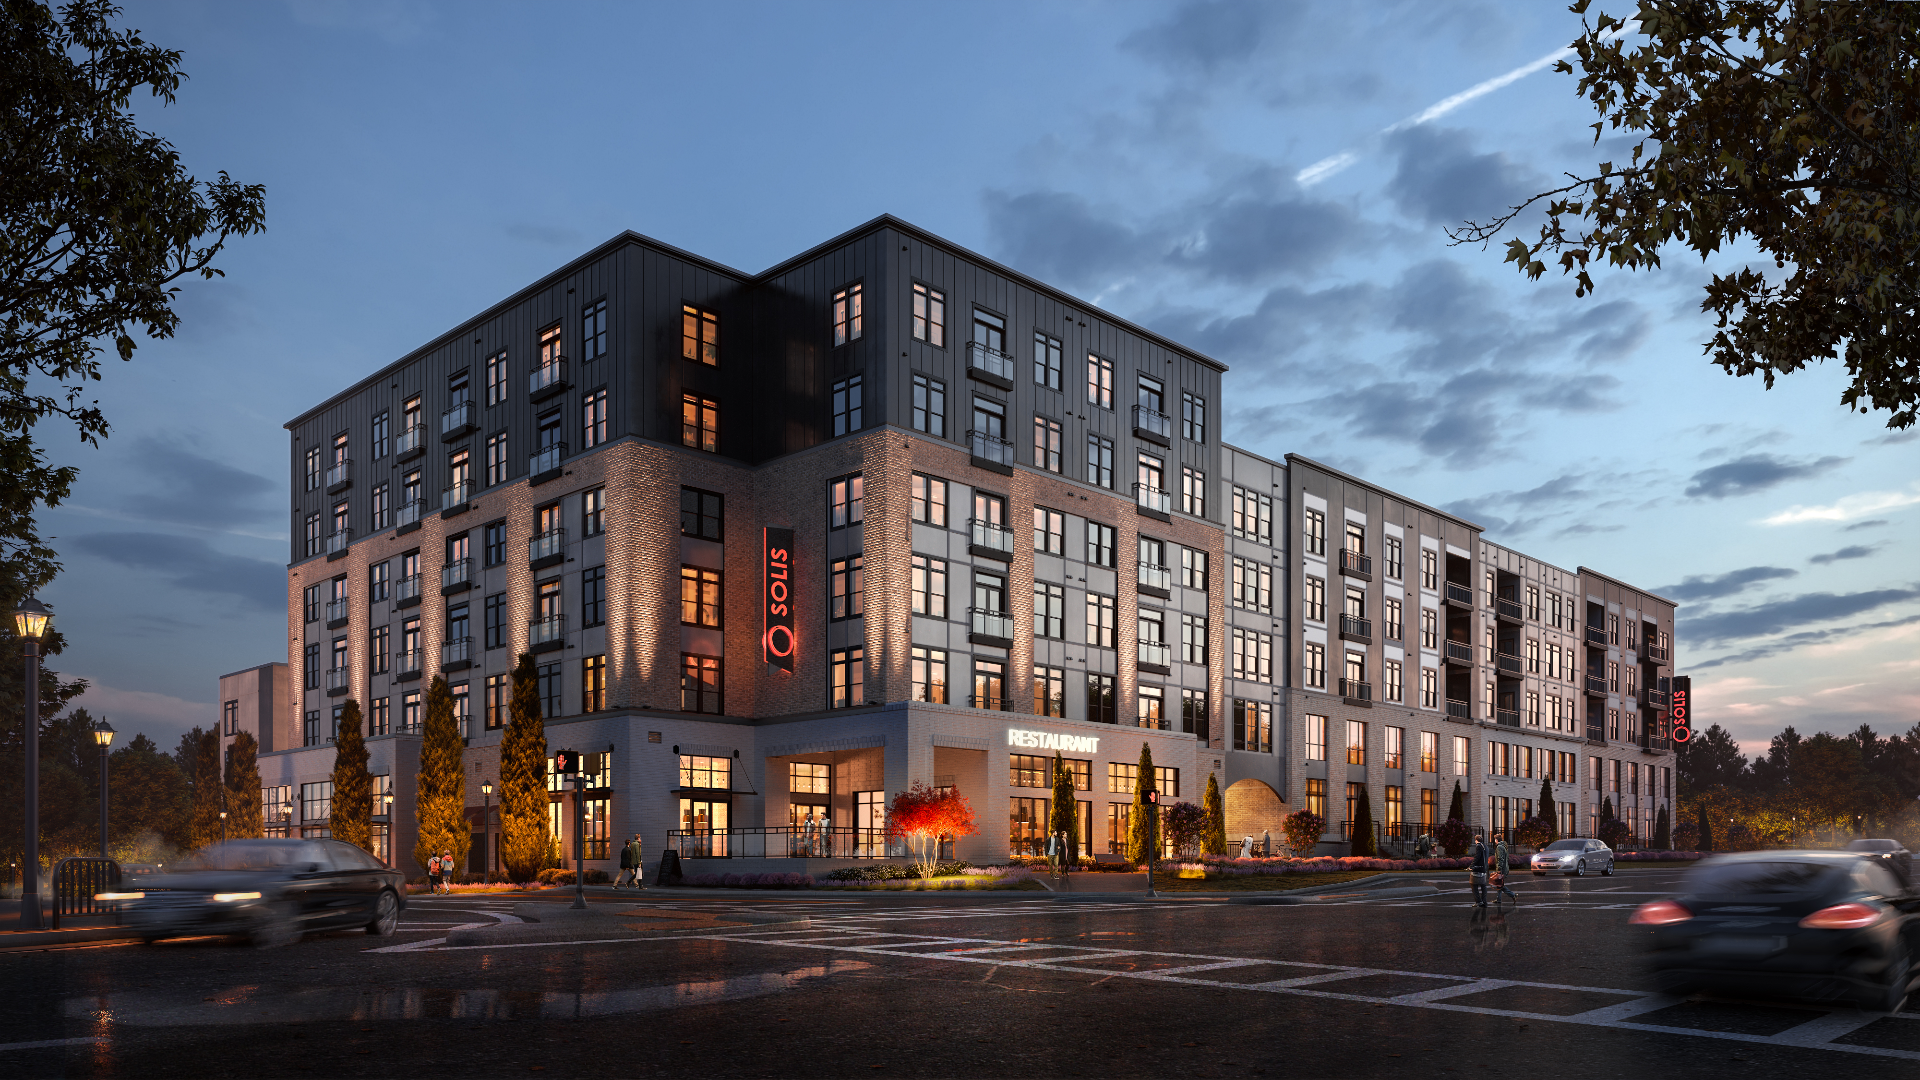
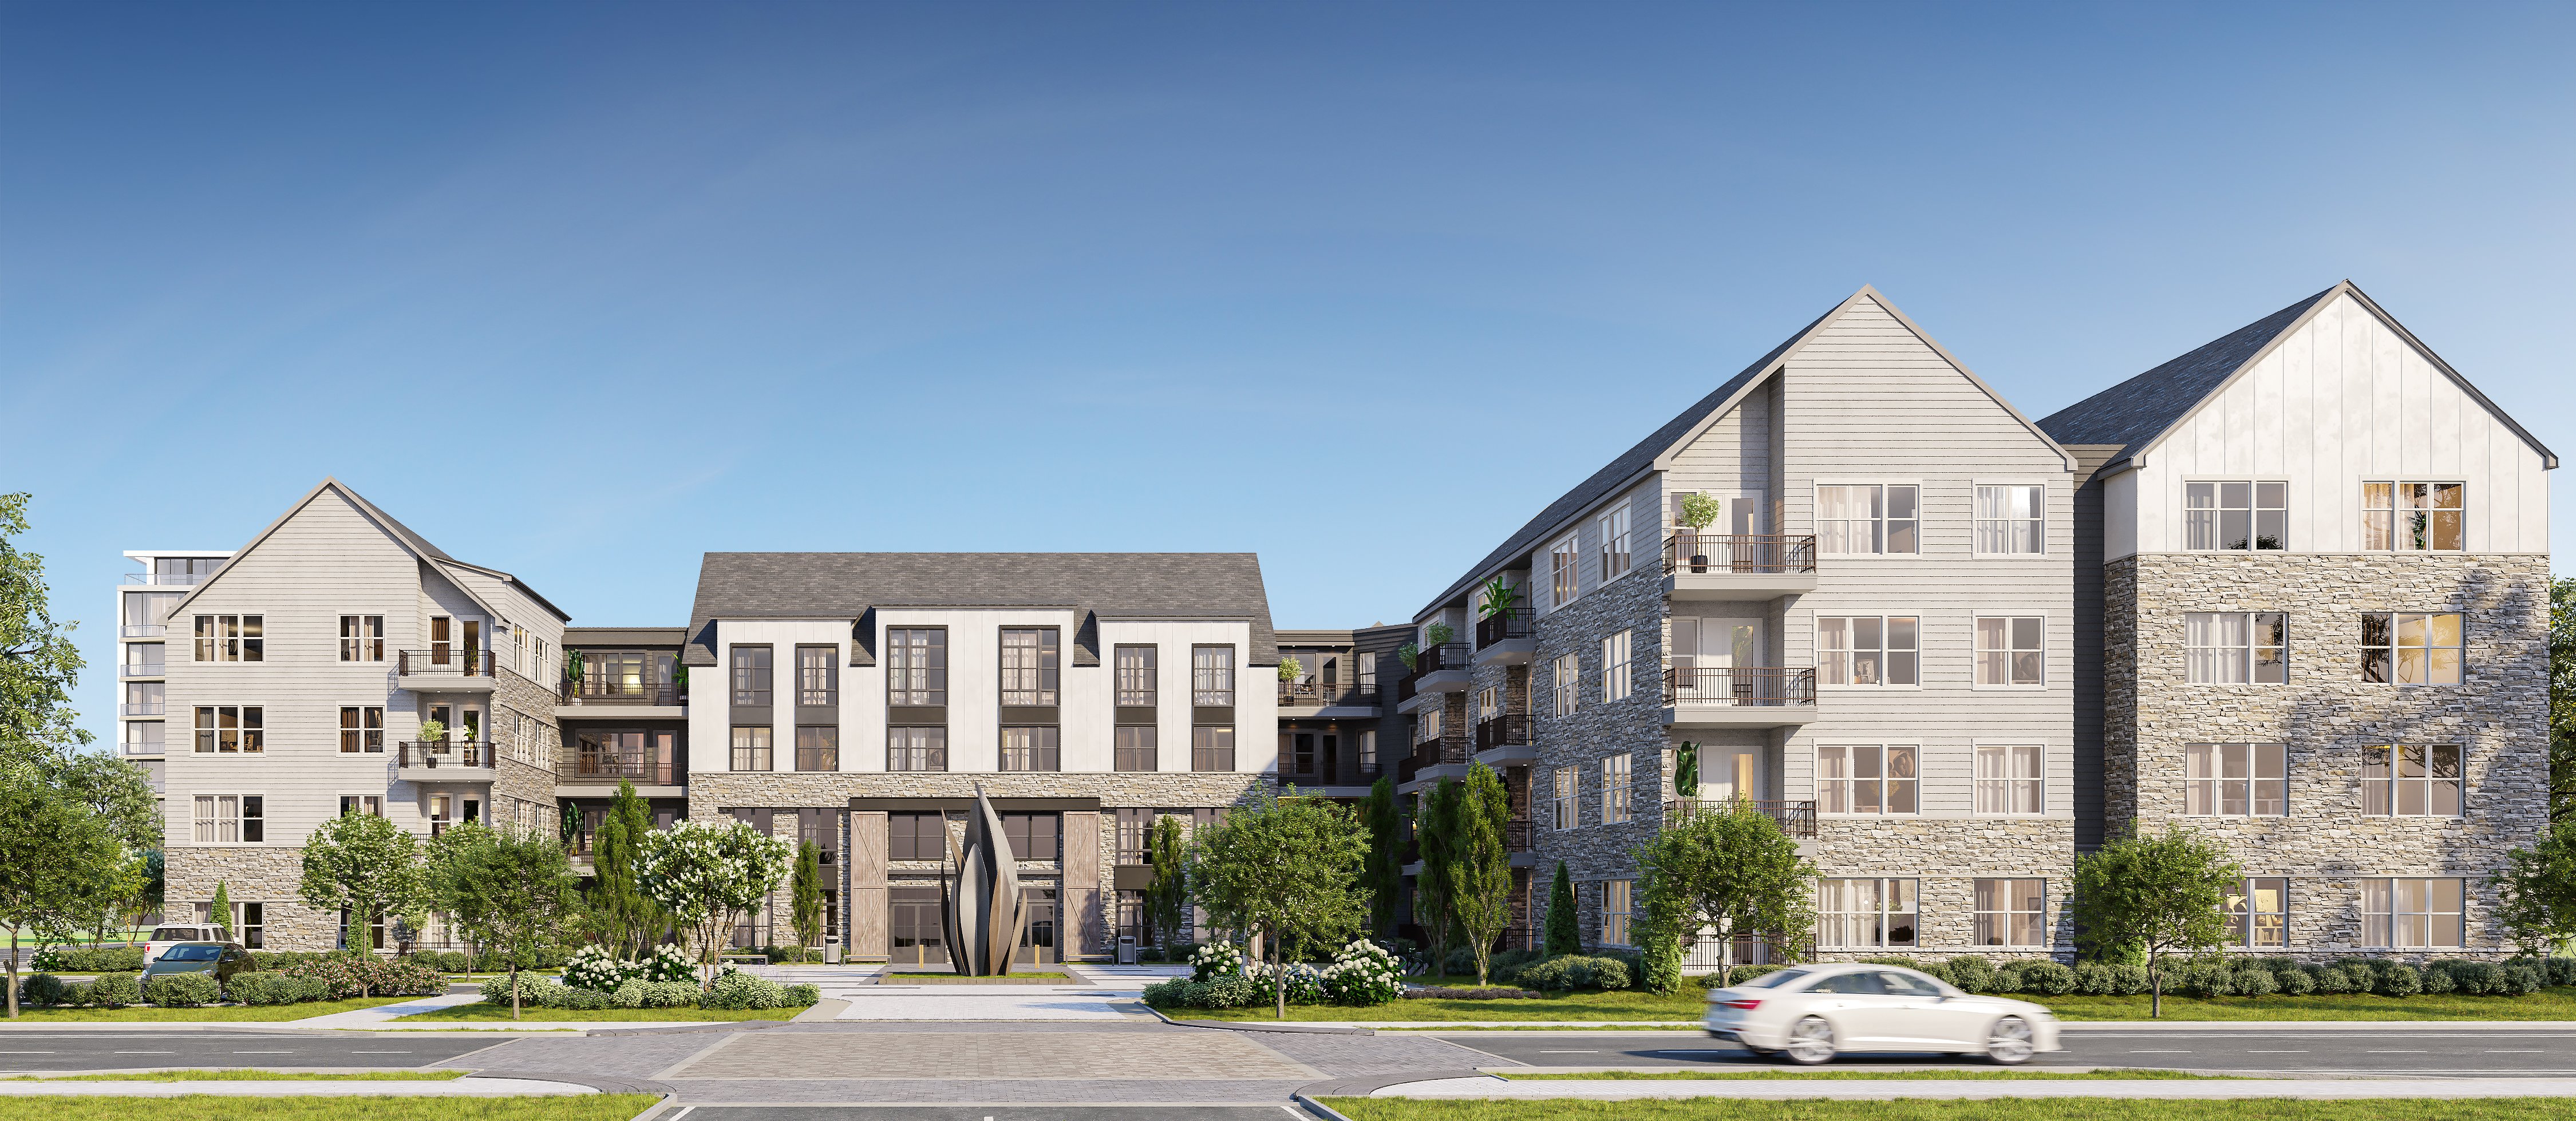
As you can see, depending on the time of day of each image and the weather, the camera angled in each image can have a dramatic difference.
In the first image, it’s a bit dark and stormy—to portray the emotion and portrayal best, the camera angle is a bit lower and captures much of the ground to show that it’s raining.
On the other hand, the second image is part of a larger community and, therefore, is angled to capture the entirety of it instead of the one building.
Without any concrete material to refer to, it may be difficult to determine what camera angles would be best for certain areas of your property—looking through examples and communicating with your 3D artist will be extremely helpful during this process.
To best market your development, you’ll probably want to show off the most “important” parts of your property.
The exterior, amenities, and model unit are often the first to be chosen when rendering a development. For each of these, you’ll need to decide the focal point or essential area you’d like prospects to see.
Deciding a perspective to capture a given space will be a bit easier when that's decided.
With the help of a 3D artist, you can collaborate to determine how to design your space best.
Remember the spaciousness of a room—accurately portraying dimensions as they relate to what space will be used for will be essential for providing transparency to consumers.
In addition, getting the correct viewpoint for your rendered image will be important.
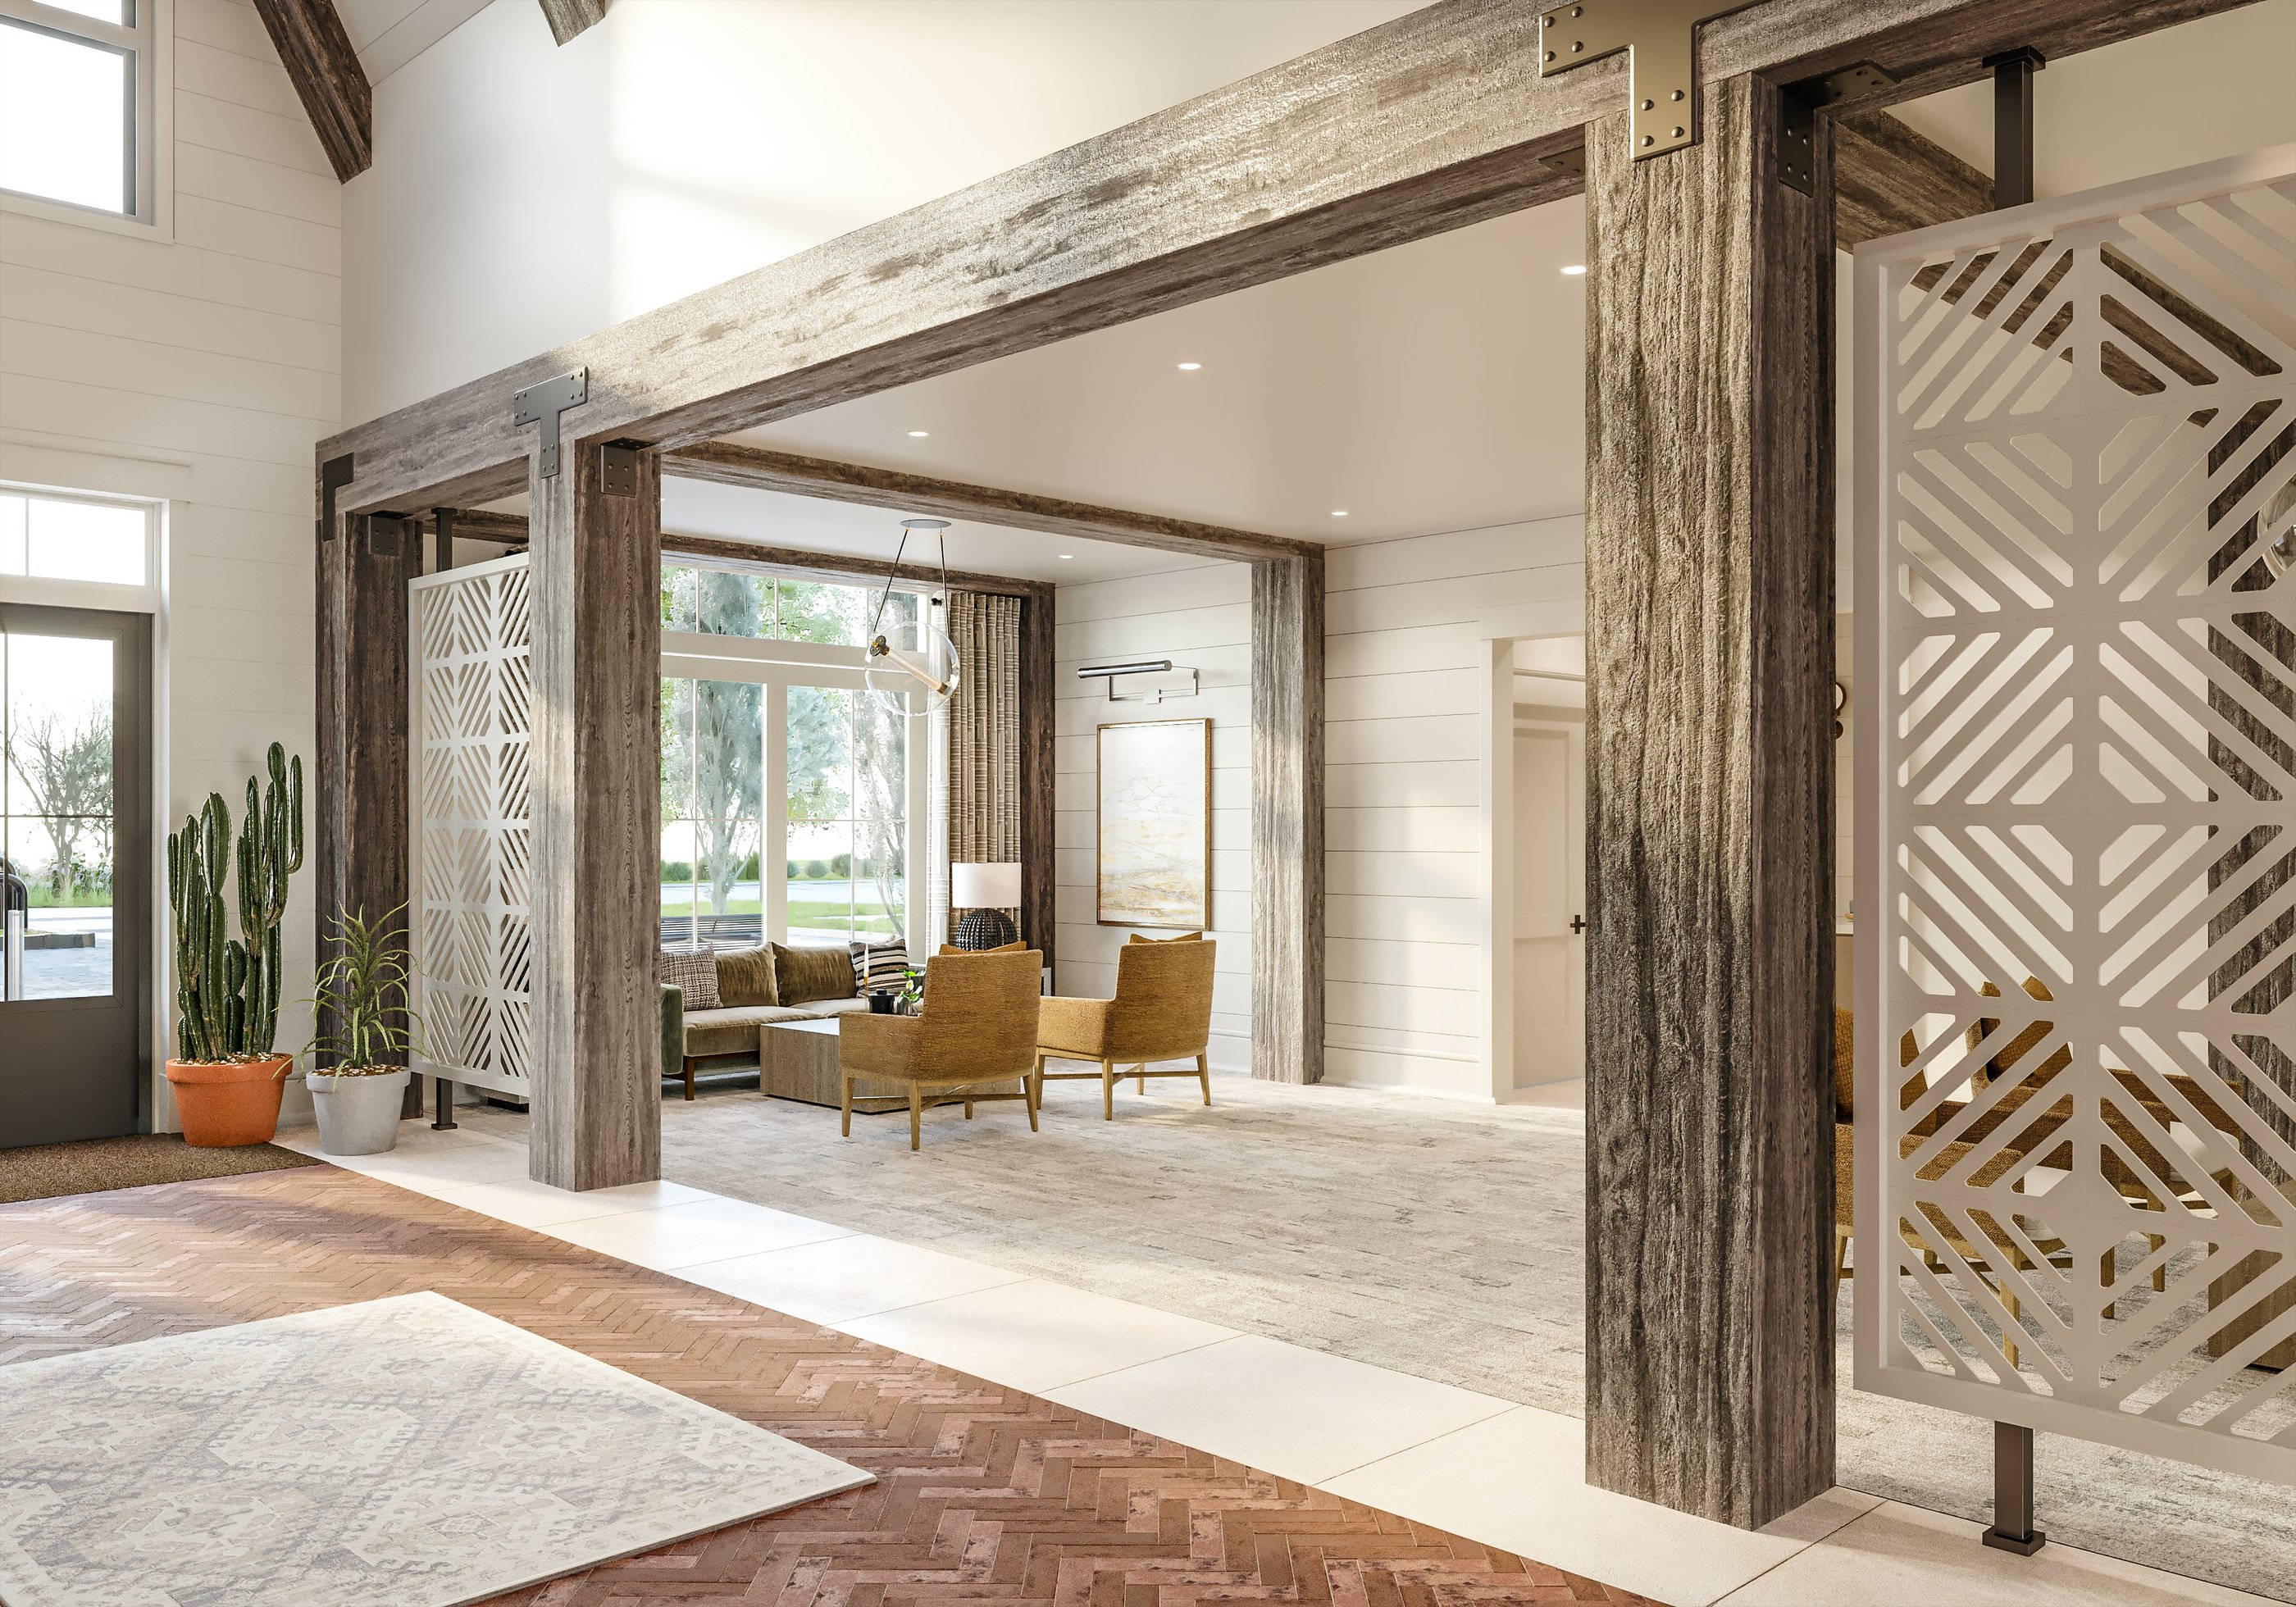
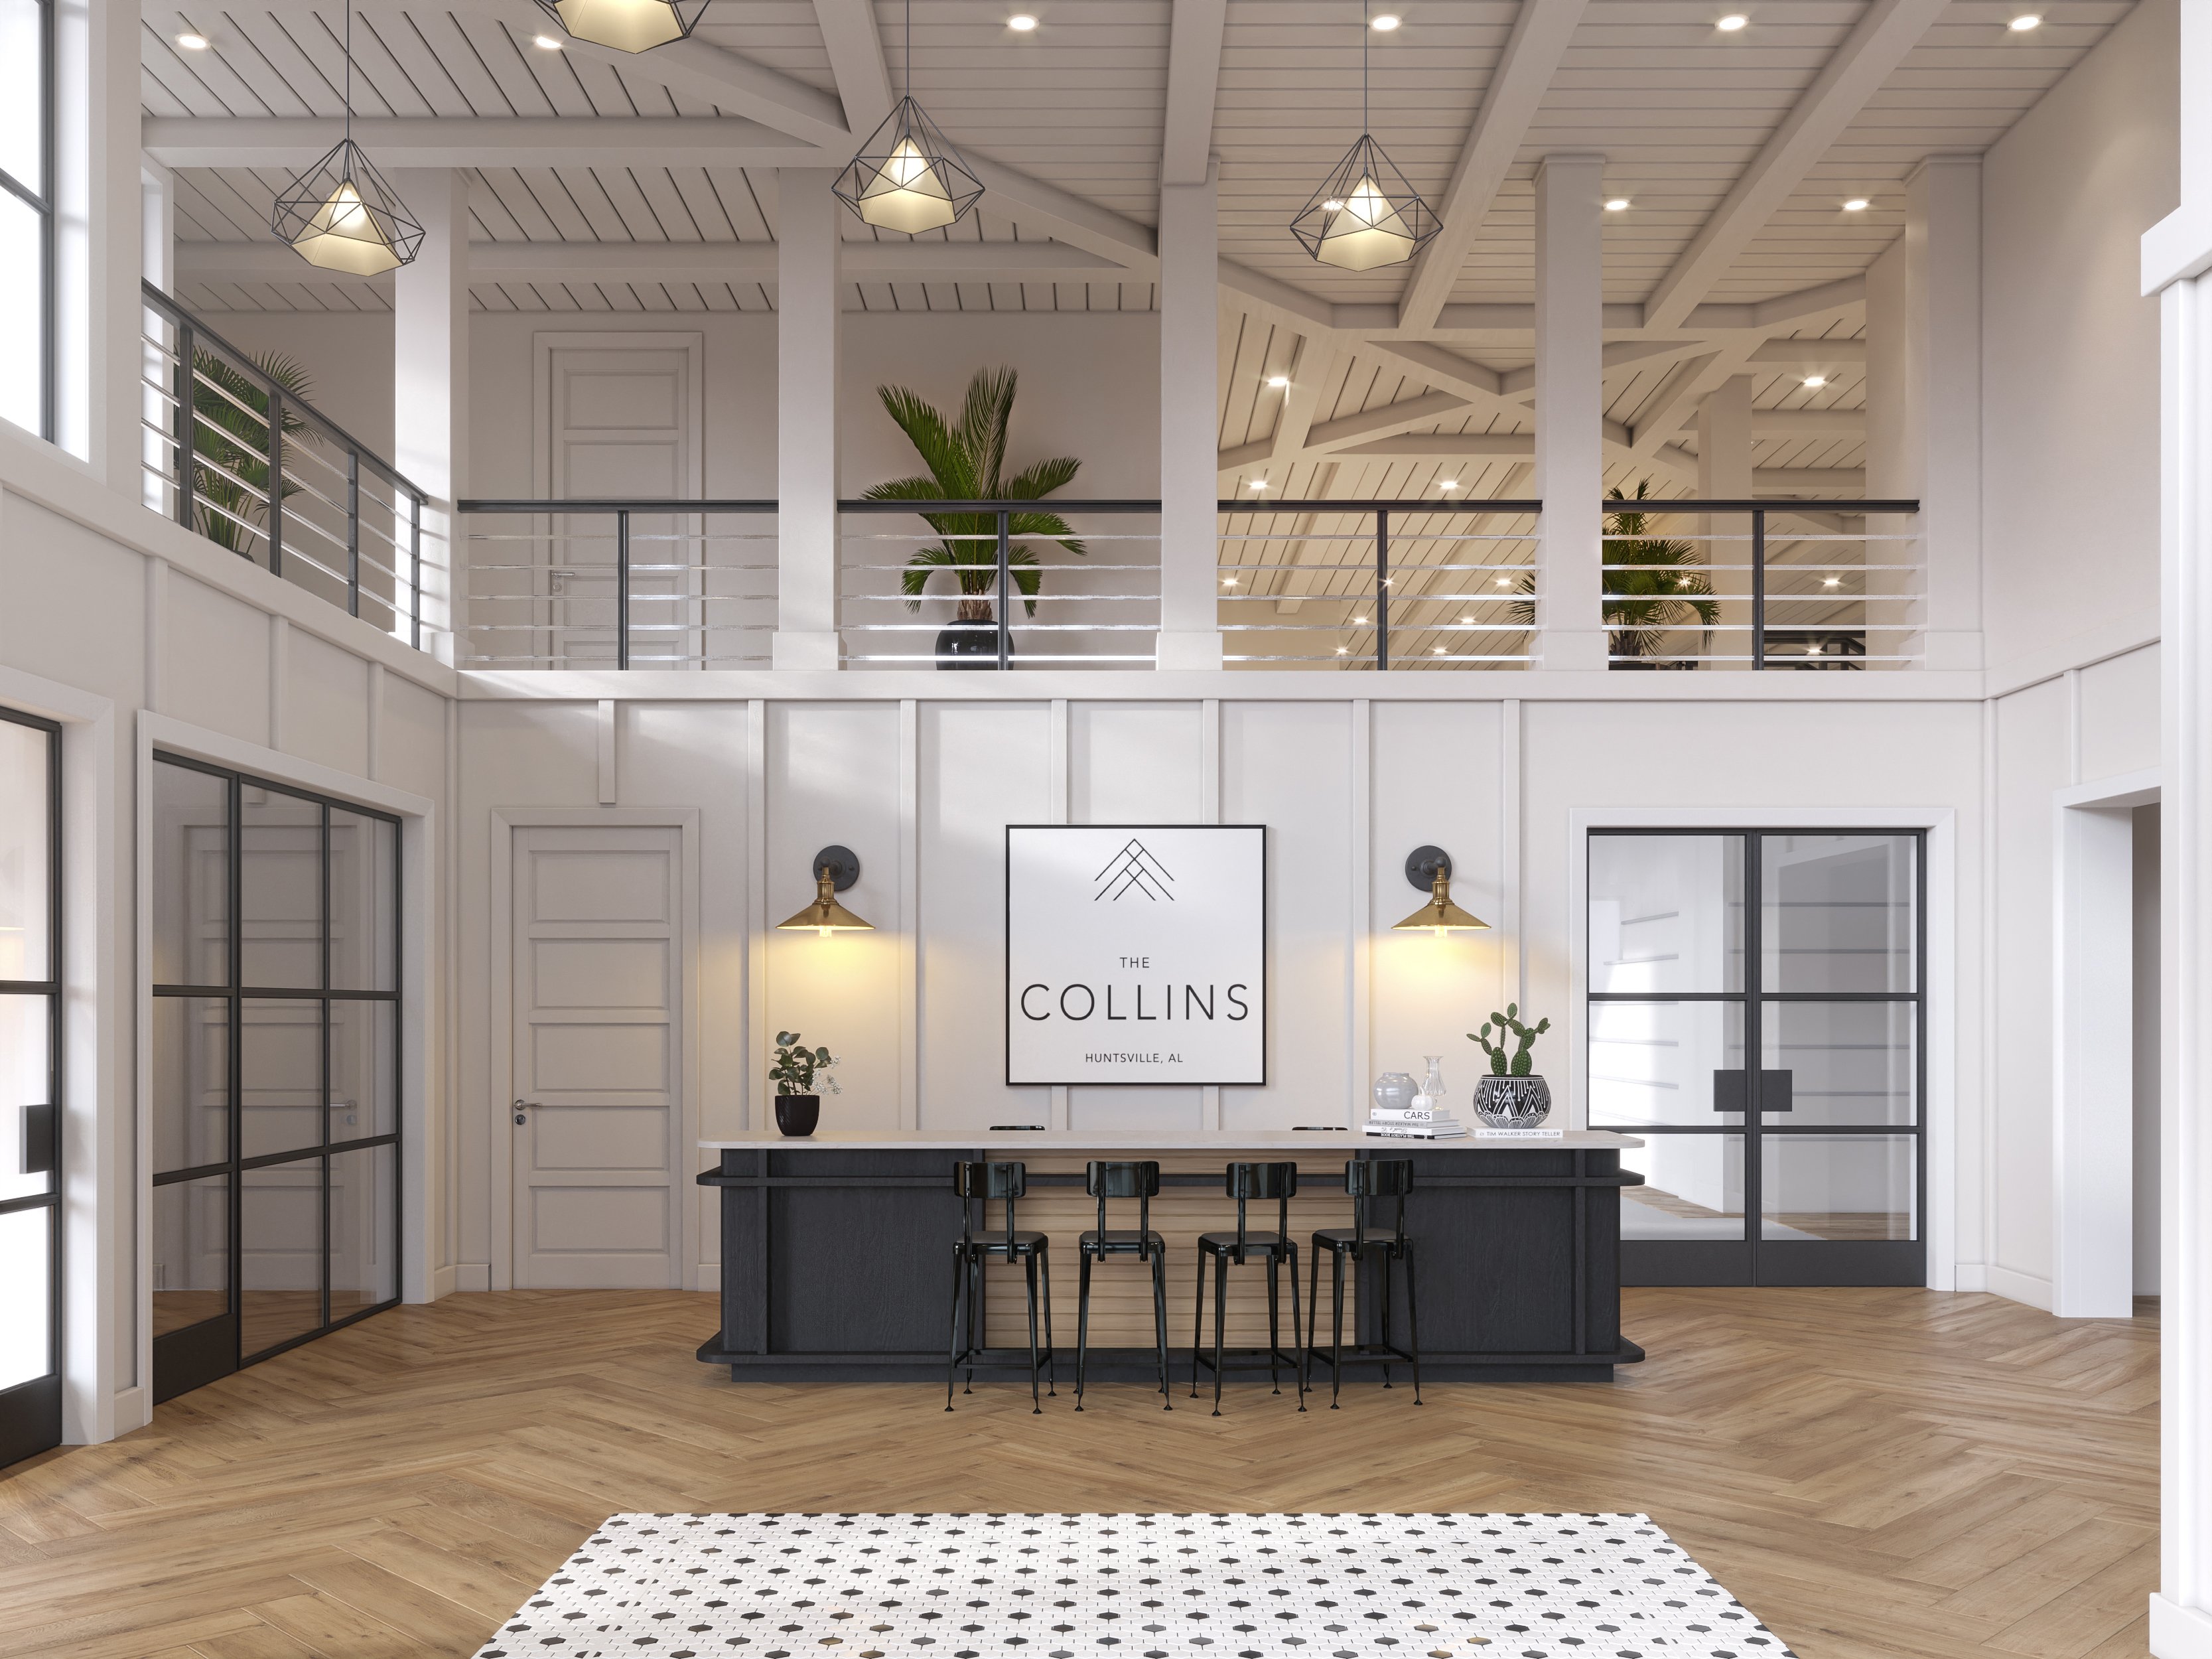
See the below examples of various perspectives of rendered spaces.
.jpg?width=4000&name=54_Watermark_Lobby_Final%20(1).jpg)
.png?width=1000&name=PSI%20(7).png)
As you can see, capturing from the front or different angles can make a huge difference in the appearance of a space. Consider what you want consumers to see and how you want them to see it.
Considering the above two points and the creative aspects of your 3D images, setting up the scene for the right “mood” or feeling may be the most difficult part.
You’ll want to ensure renderings accurately depict the property you’re building, so creating a certain mood should not detract from providing important information regarding the space and dimensions.
That said, to choose the best camera angles for your images' mood, consider the criteria below.
The most natural of the three, eye-level perspectives, are pretty safe and good for portraying lots of information in just one shot.
This angle is most commonly used due to its lack of emotion—so if there’s an important space that relies on criteria such as the dimensions or layout (such as bedrooms or smaller spaces), it’ll probably be the safest bet to utilize an eye-level shot.
Low-angle shots are perhaps the most dramatic on this list.
In films, oftentimes, actors will be shot at lower perspectives when portraying a serious or powerful tone—and the same goes for architecture.
Most notably used for exterior images, low angles emphasize how tall or expansive a building is -or will be and can also be great for showcasing the entrance to your building.
High angles for property images are a good way to highlight the layout of a given space.
As for the mood it inhibits, high perspectives can also have a sense of power or an “inside perspective” as if you’re looking over a space.
-min.jpg?width=4000&name=45_5MLK_Rooftop_Deck_D3_Cam_2%20(1)-min.jpg)
Although not typically recommended, straight-on shots can end up looking quite powerful as well as realistic.
Below is an example of a straight-on rendering that turned out well.
As you can see, this is the entrance to a multifamily community, which benefited from this perspective—it helped shape the mood and tone of the property well.
Ultimately, it’s best practice to consider the above criteria before finalizing on a certain angle. Be sure to review examples of 3D renderings or even regular photography to get the best idea of what will work well with your space.
Researching and communicating openly with your 3D provider will be the best course for deciding the best camera angles for your renderings. Remember that every development is unique and will require a lot of thought and preparation before finalizing perspectives.
Looking for a 3D service provider? Click here to get started.
The use of 3D renderings is necessary in the development, pre-sell or pre-leasing stages of multifamily, senior living and many other industries. The...
Staying ahead of the competition within the real estate industry is crucial. One tool that has transformed the marketing landscape is 3D renderings....
There is no better feeling than having signed tenants for your new community prior to its completion. To make that a reality, property owners must...