 Rayhanna Guillen
Debunked: 3 Myths About 3D Renderings in Real Estate
The 3D rendering market is estimated to reach up to $4 billion come 2025, so why are there still so many misconceptions about this digital tool?
The use of 3D renderings is necessary in the development, pre-sell or pre-leasing stages of multifamily, senior living and many other industries.
The term 3D rendering refers to the method of creating a photorealistic image using computer software. That seems simple enough, but to most people, the process of a 3D rendering seems daunting. When you sign up for 3D rendering services, there may be some back and forth between clients and the 3D artist. After all, a lot goes on behind the scenes when creating a 3D rendering.
To help simplify what the 3D process looks like, I’ve broken the stages down in a quick overview to help explain.
After gathering all the necessary assets and information to get the project started, here are the main steps to create a 3D rendering:
To developers and architects, this is second-nature. But perhaps to marketers and other real estate professionals just getting their feet wet with 3D renderings, terms like grey geometry or environment lighting may not be completely understood. You might also be wondering, can camera angles be changed throughout the process? Keep reading to understand these 3D rendering stages.
The first step of any 3D rendering process is determining the camera angle of the photo. Camera angles (which also may be referred to as perspectives) are an important part of the 3D rendering process. An angle can really make or break the final rendering. Camera angles may seem like easy decisions, but choosing a camera angle is very important, because this decision can’t be changed easily after it’s been built.
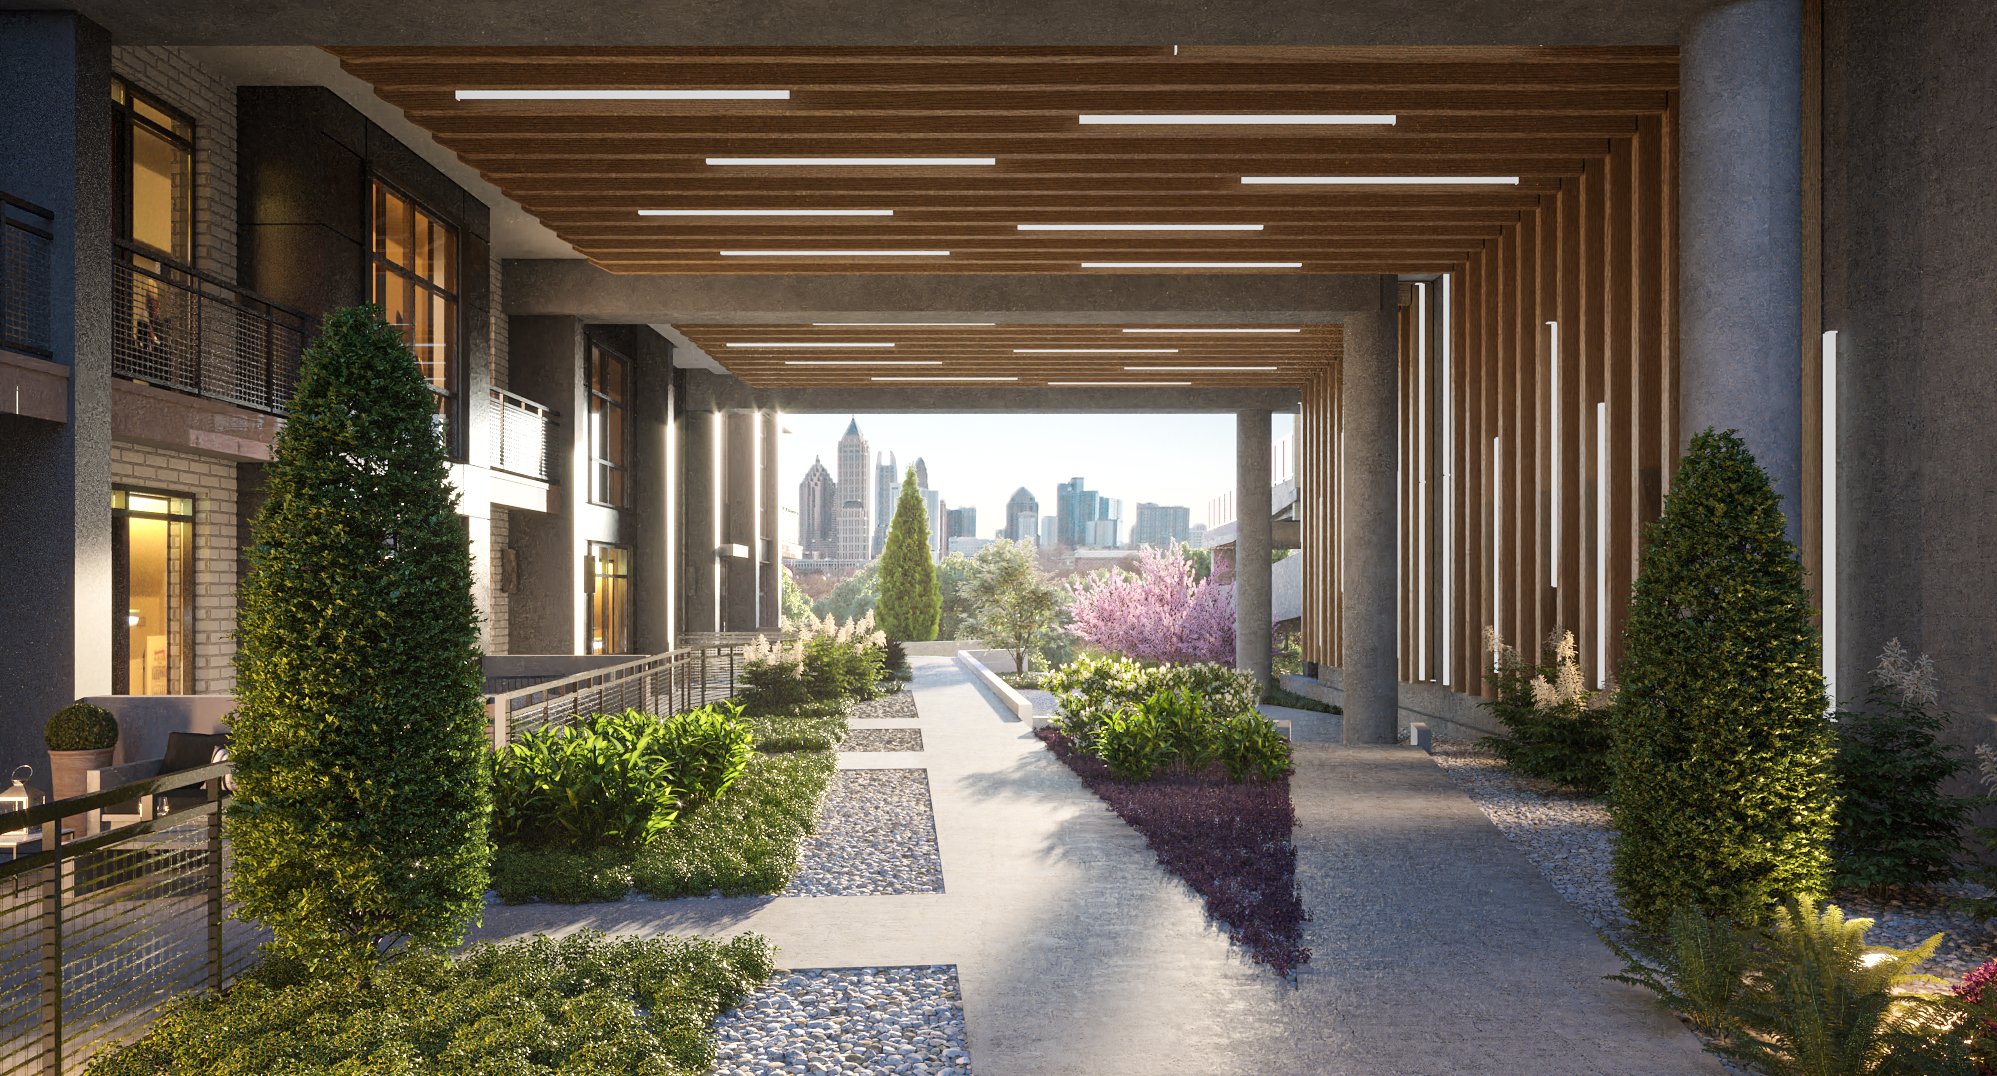
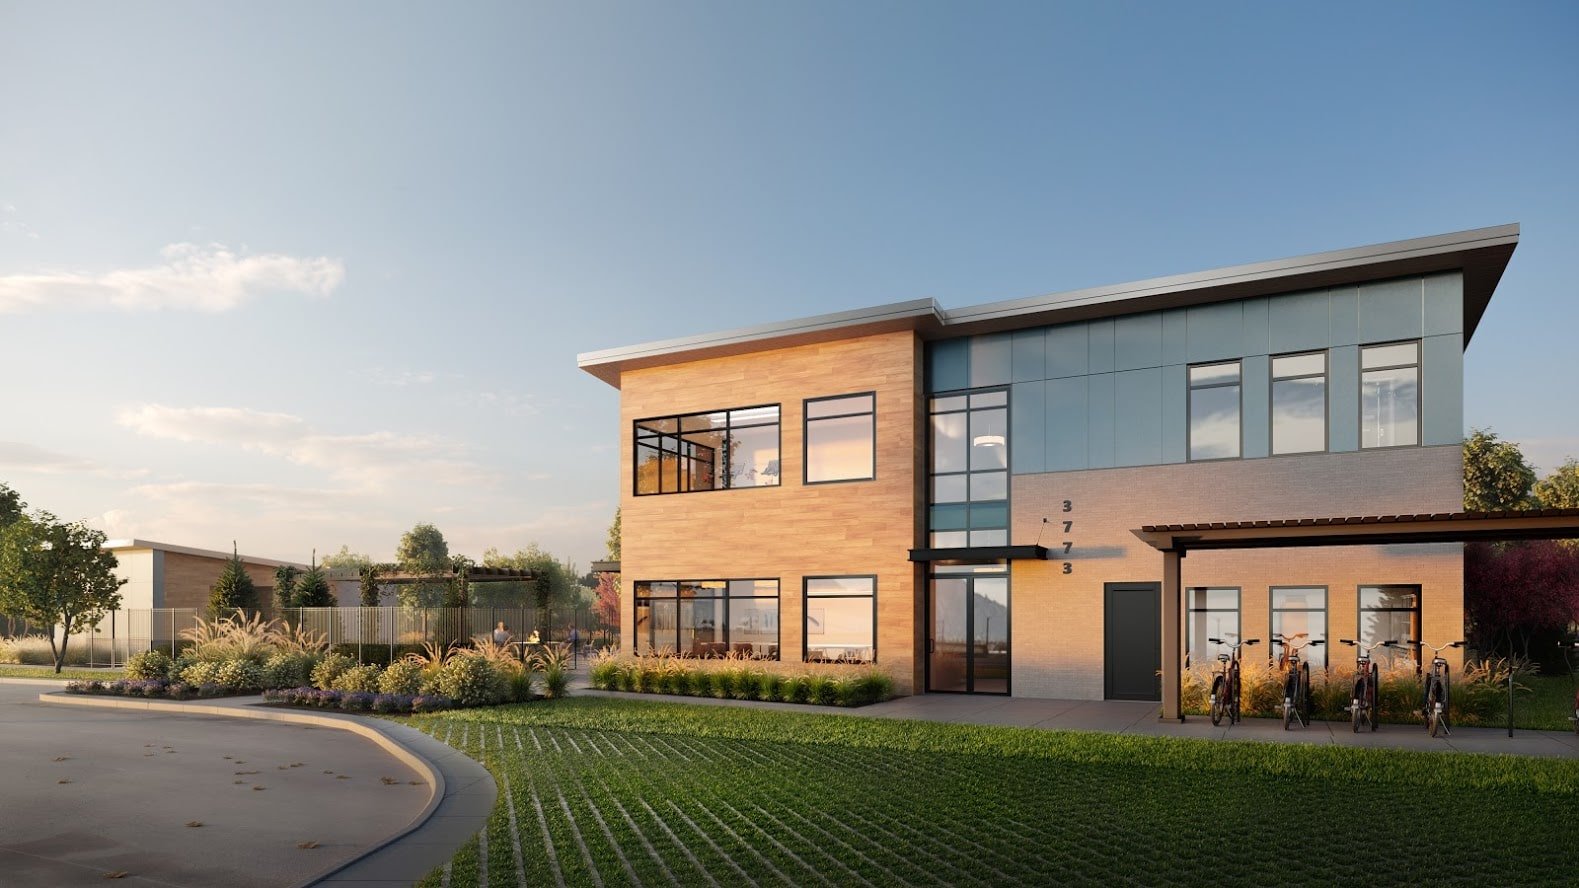
An angle is more than just choosing which way the camera will face—it’s about achieving the emotion you want and portraying spaciousness in the 3D imagery. For exterior renderings, there is much to consider, from the lighting in the sky to the architectural components surrounding your development.
You have to ask yourself what is important to your development. Is it the neighborhood? Do you want your building front and center? Do you want a more intimate and close up perspective? Do you want it at eye level? What details do you want your audience to see?
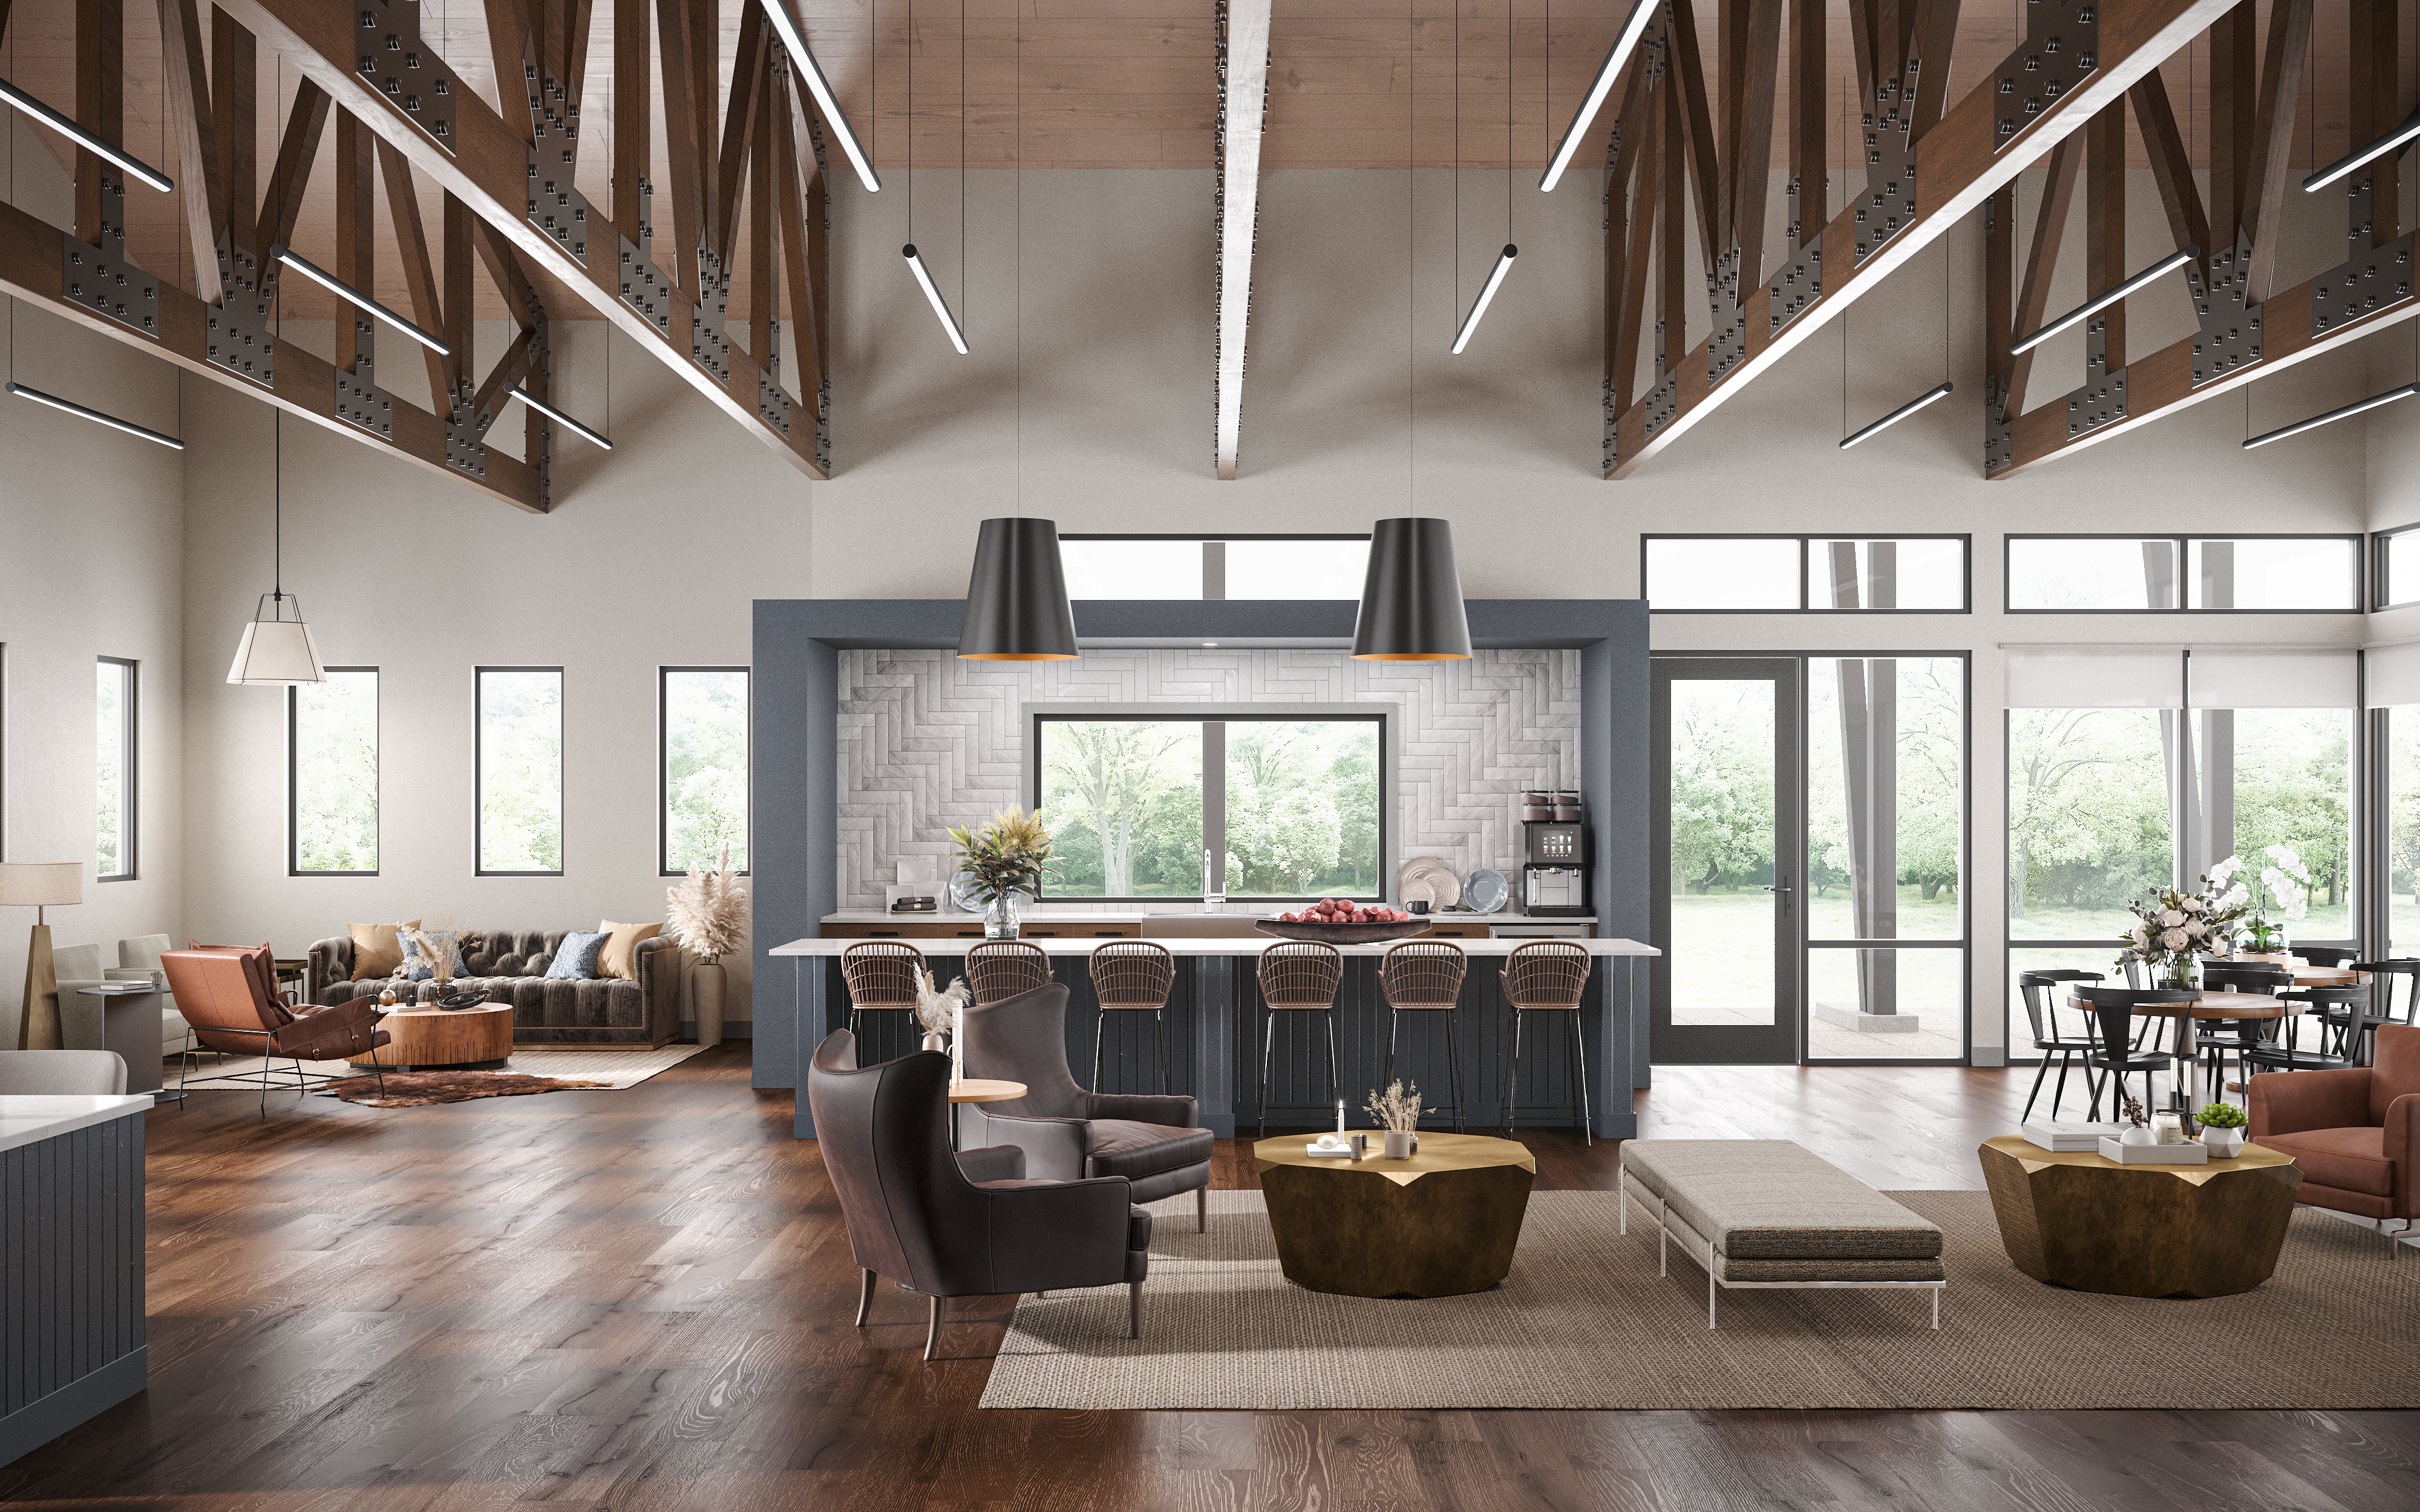
Similarly, interior 3D perspective renderings can have a variety of different angles to choose from, where you may center a part of the room, or angle the lens in such a way that makes the room feel spacious and grand.
Next, the grey geometry (also referred to as grey renders or white box) of the space is created. This is typically the very first step when a 3D artist will show what the space will look like.
Grey geometry is just like it sounds: it doesn’t use any colors, materials and the render may not show any environment lighting either. The main goal of this step is to show a 3D client the layout, angle and flow of the 3D rendering.
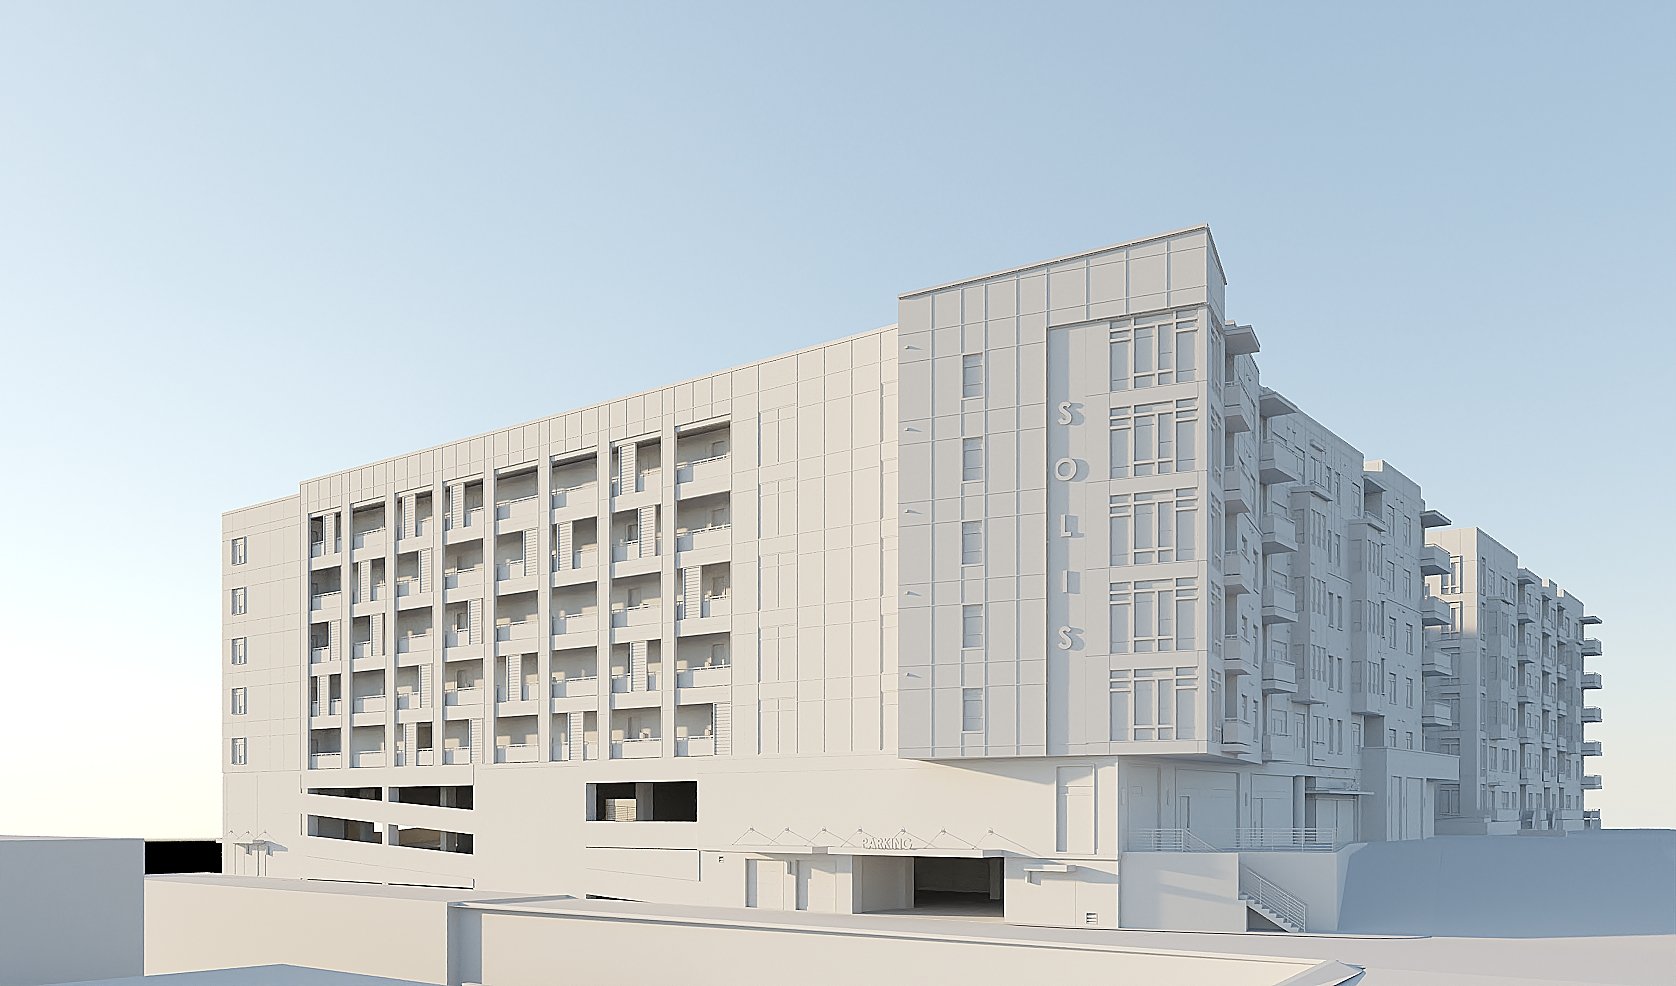
What is important to note is that these renders are very simple and not the final, photorealistic product. Typically this step is when a client will want to make changes to a camera angle. Camera angles should be confirmed once a client sees the grey geometry, and any other changes should be made if geometry is not correct.
Some clients may want to get into the details of the design and aesthetics at this stage, but the main priority here is to confirm the grey geometry and camera angles.
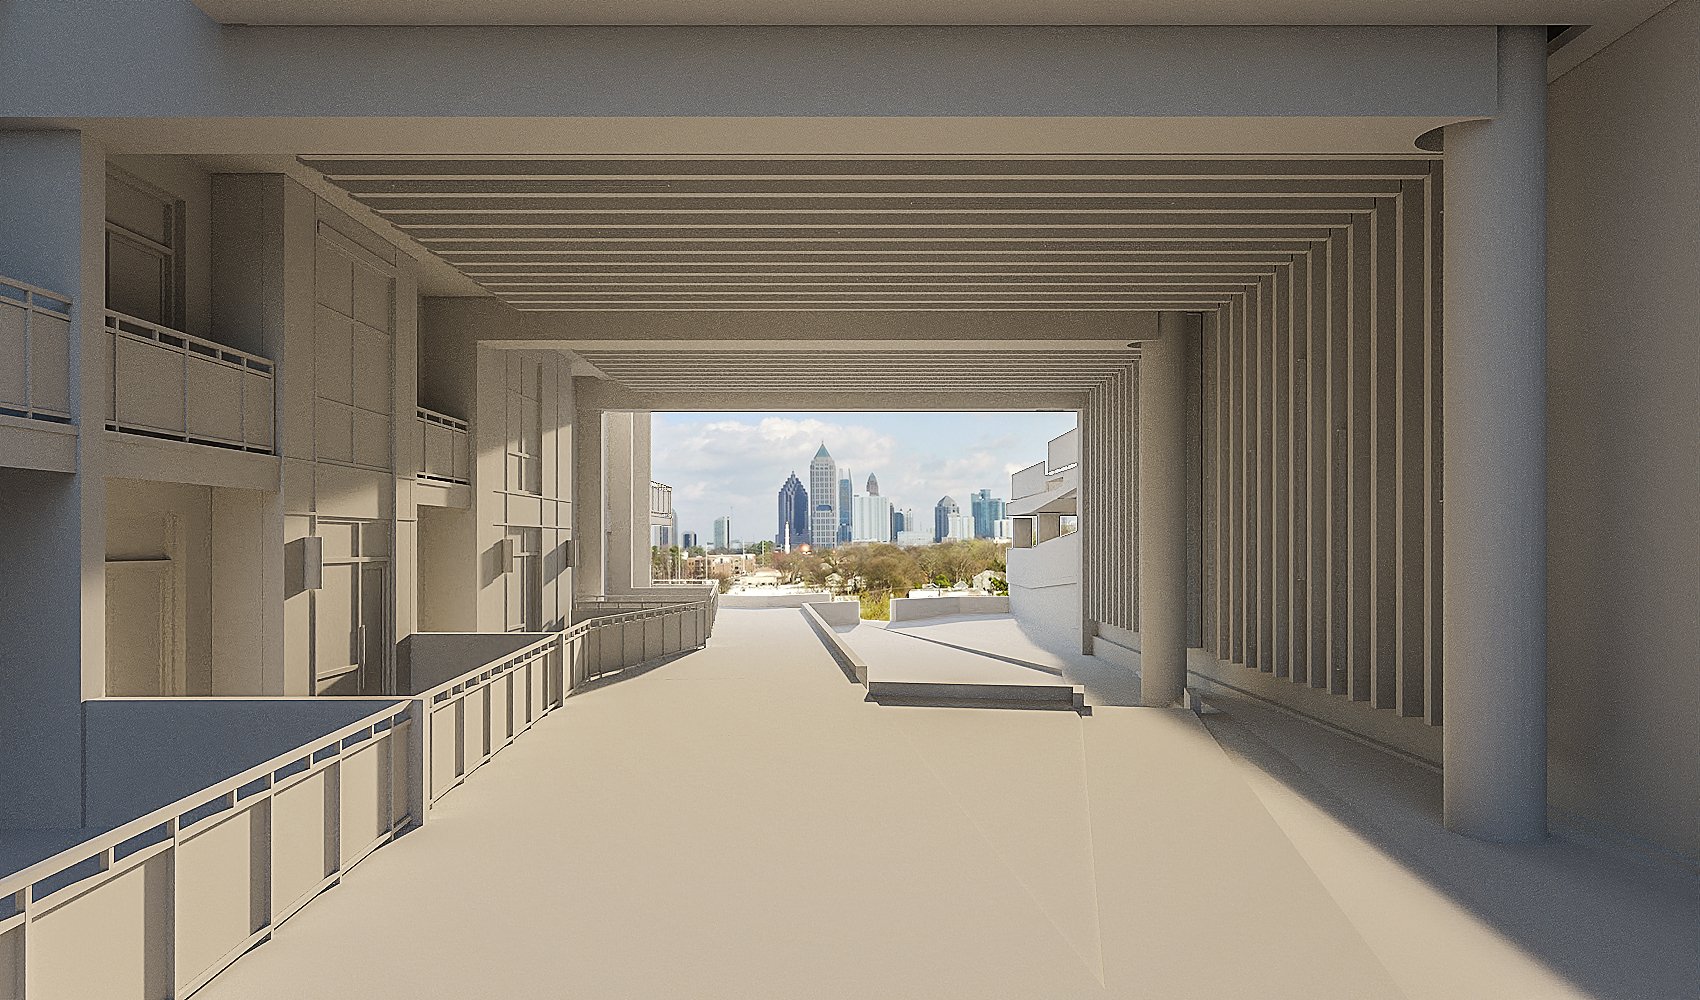
Once a client approves the camera angles and 3D grey geometry, a 3D artist will then move forward with adding materials, textures, lighting and shadows. Of course, the camera angle of the photo will determine much of the lighting, as well as if it’s an exterior or interior shot.
Exterior shots are going to be naturally brighter, and interior shots with windows will bring in a lot of light. If the render is outside, the 3D artist will begin building out the landscape more and start adding more realistic elements.
Lastly, a 3D artist will add any finishing touches to the render, including design elements, furniture, greenery and landscape if outside, and decor. Design elements should be discussed prior to this stage so the 3D artist is aware of what aesthetic the client is aiming for, but changes are normally made during this phase as more details come together.
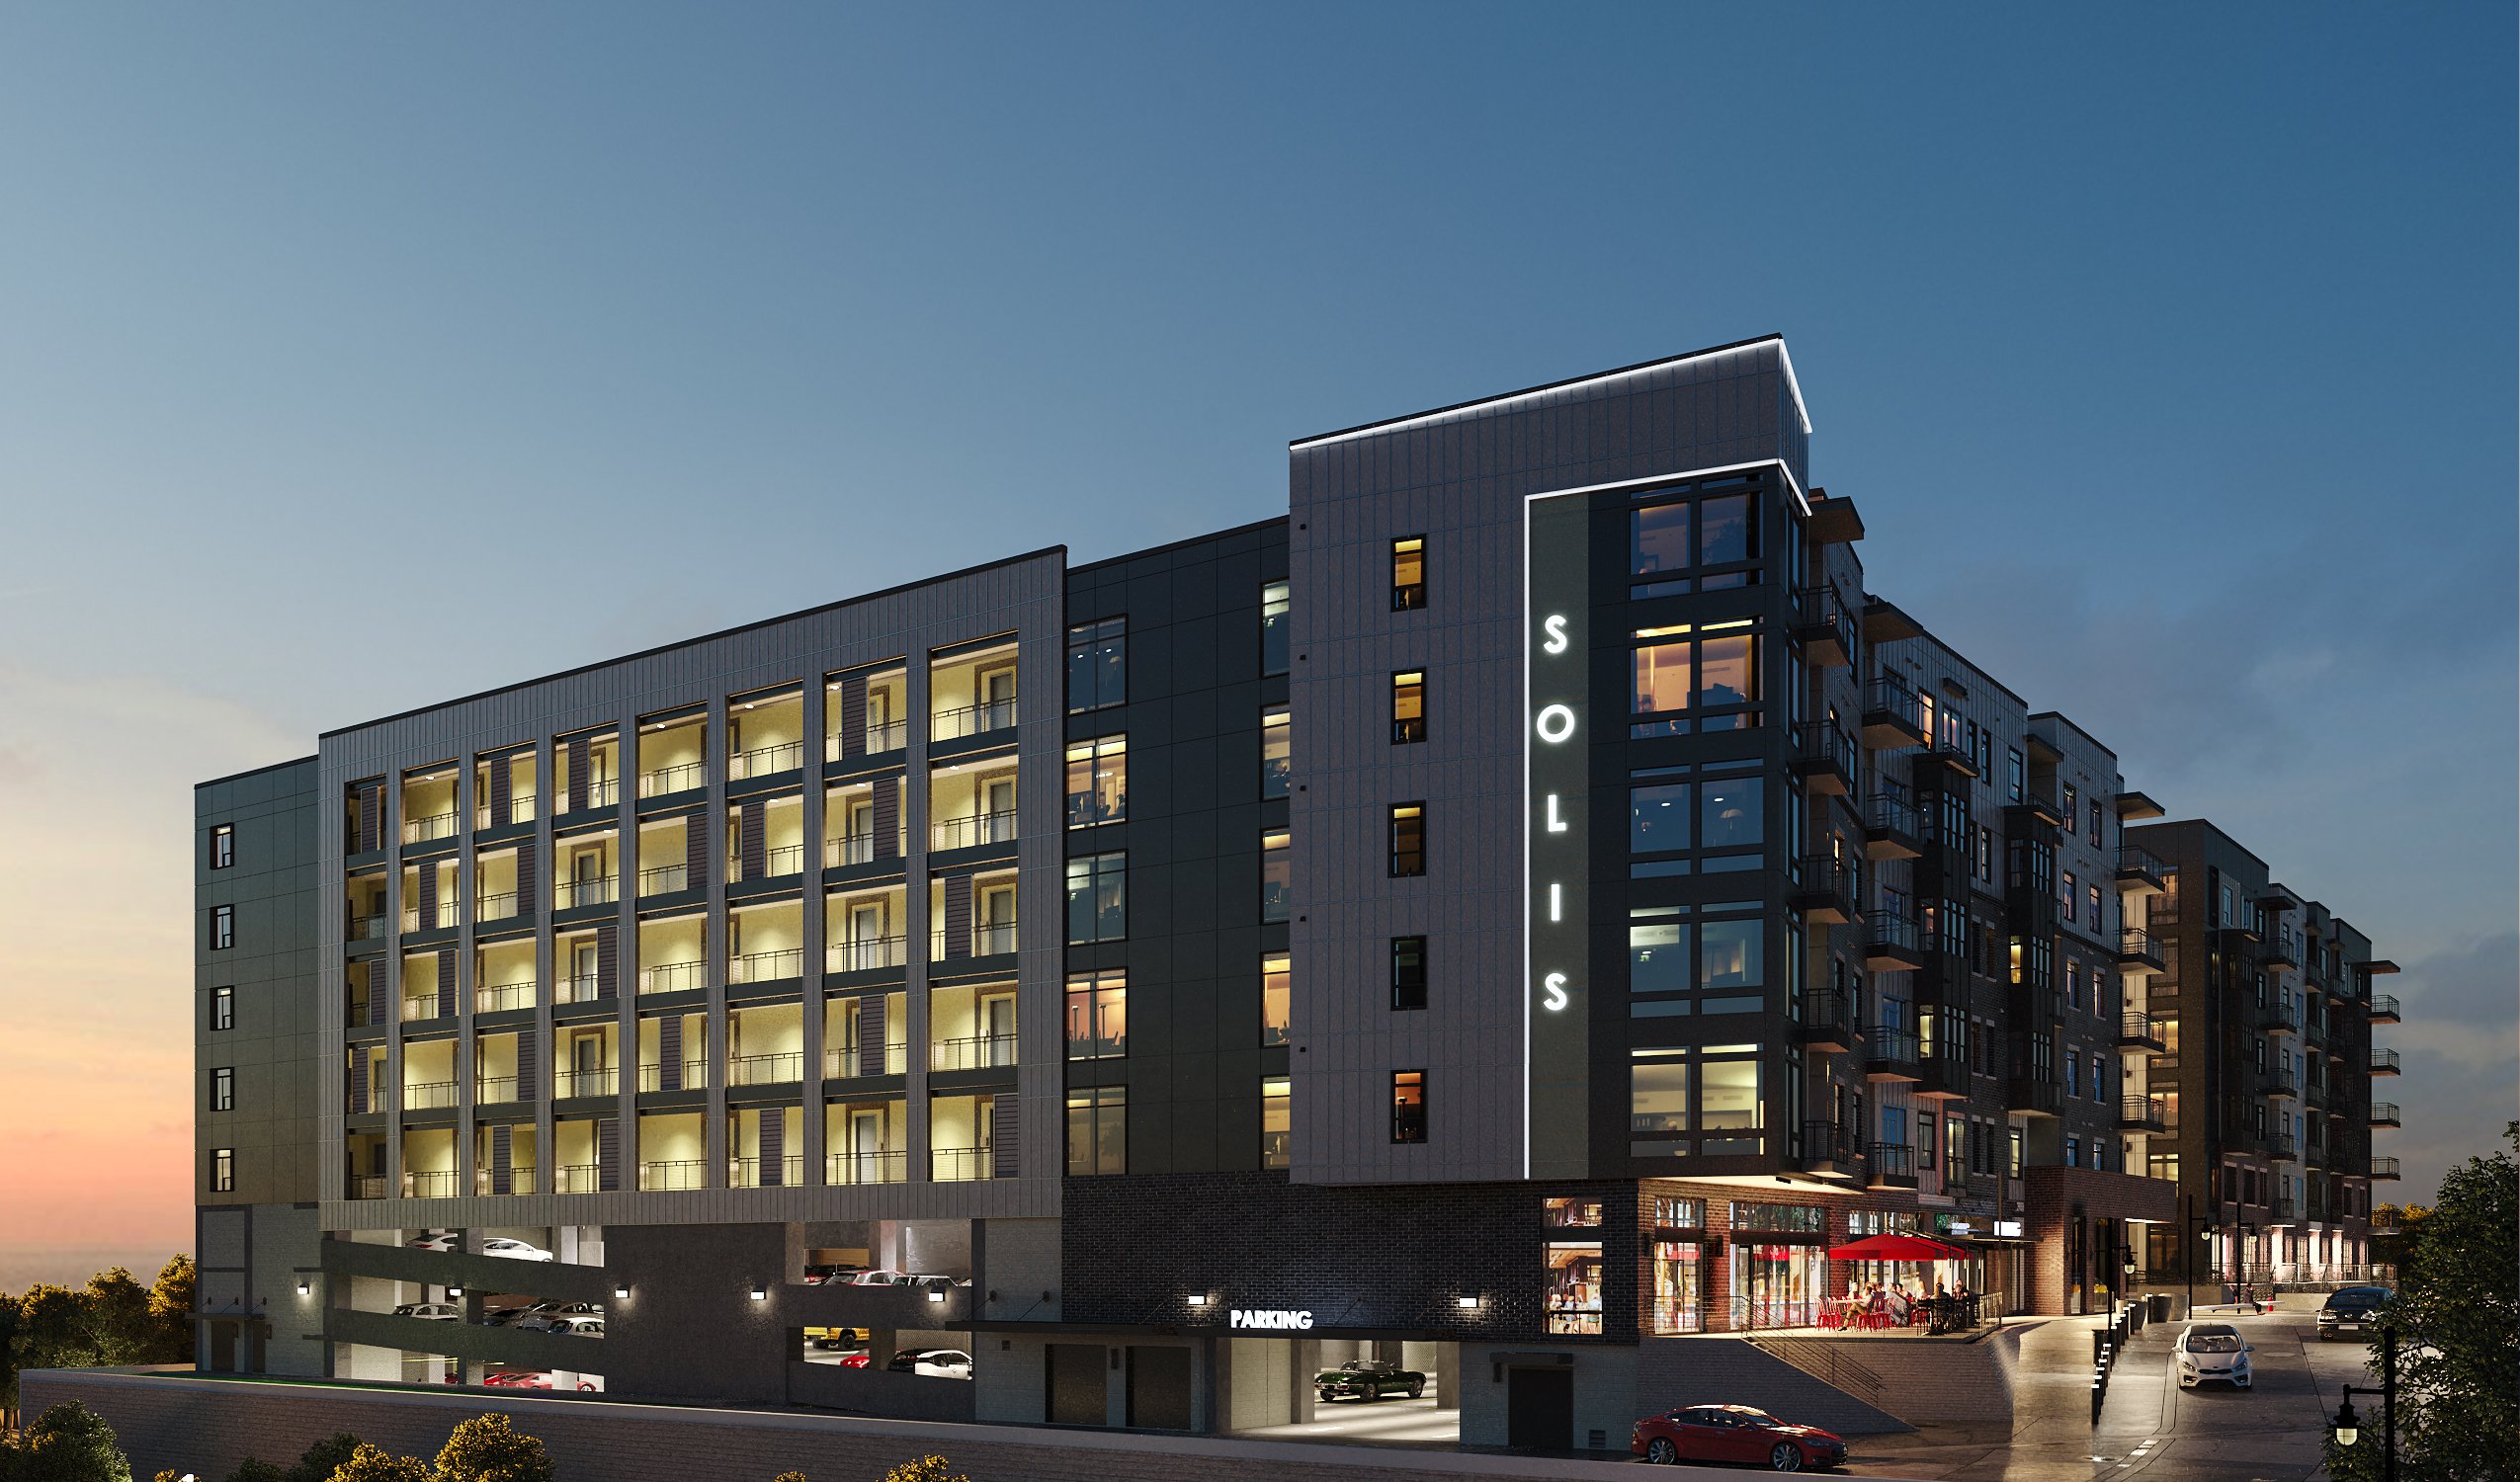
Of course, every 3D rendering company will have its own internal processes as well, and that can always look a little different from what you see above. These four steps, however, are typically what you are going to see with any 3D process.
If you are just getting started with 3D rendering services, browse a list of rendering examples or talk to our team today and let us know how we can help create photorealistic renders of your next project.
.png)
The 3D rendering market is estimated to reach up to $4 billion come 2025, so why are there still so many misconceptions about this digital tool?
If you clicked on this, you probably have some knowledge or interest in 3D renderings for apartments.
3D Renderings play a crucial role in the marketing steps of a new major property. To name a few benefits, 3D renderings have the power to: