How to Take Striking Photography for Listings to Rent Units Fast
Photography is worth a thousand words, or at least, it used to be. Today, it’s worth a 42% increase in click-through rate.
4 min read
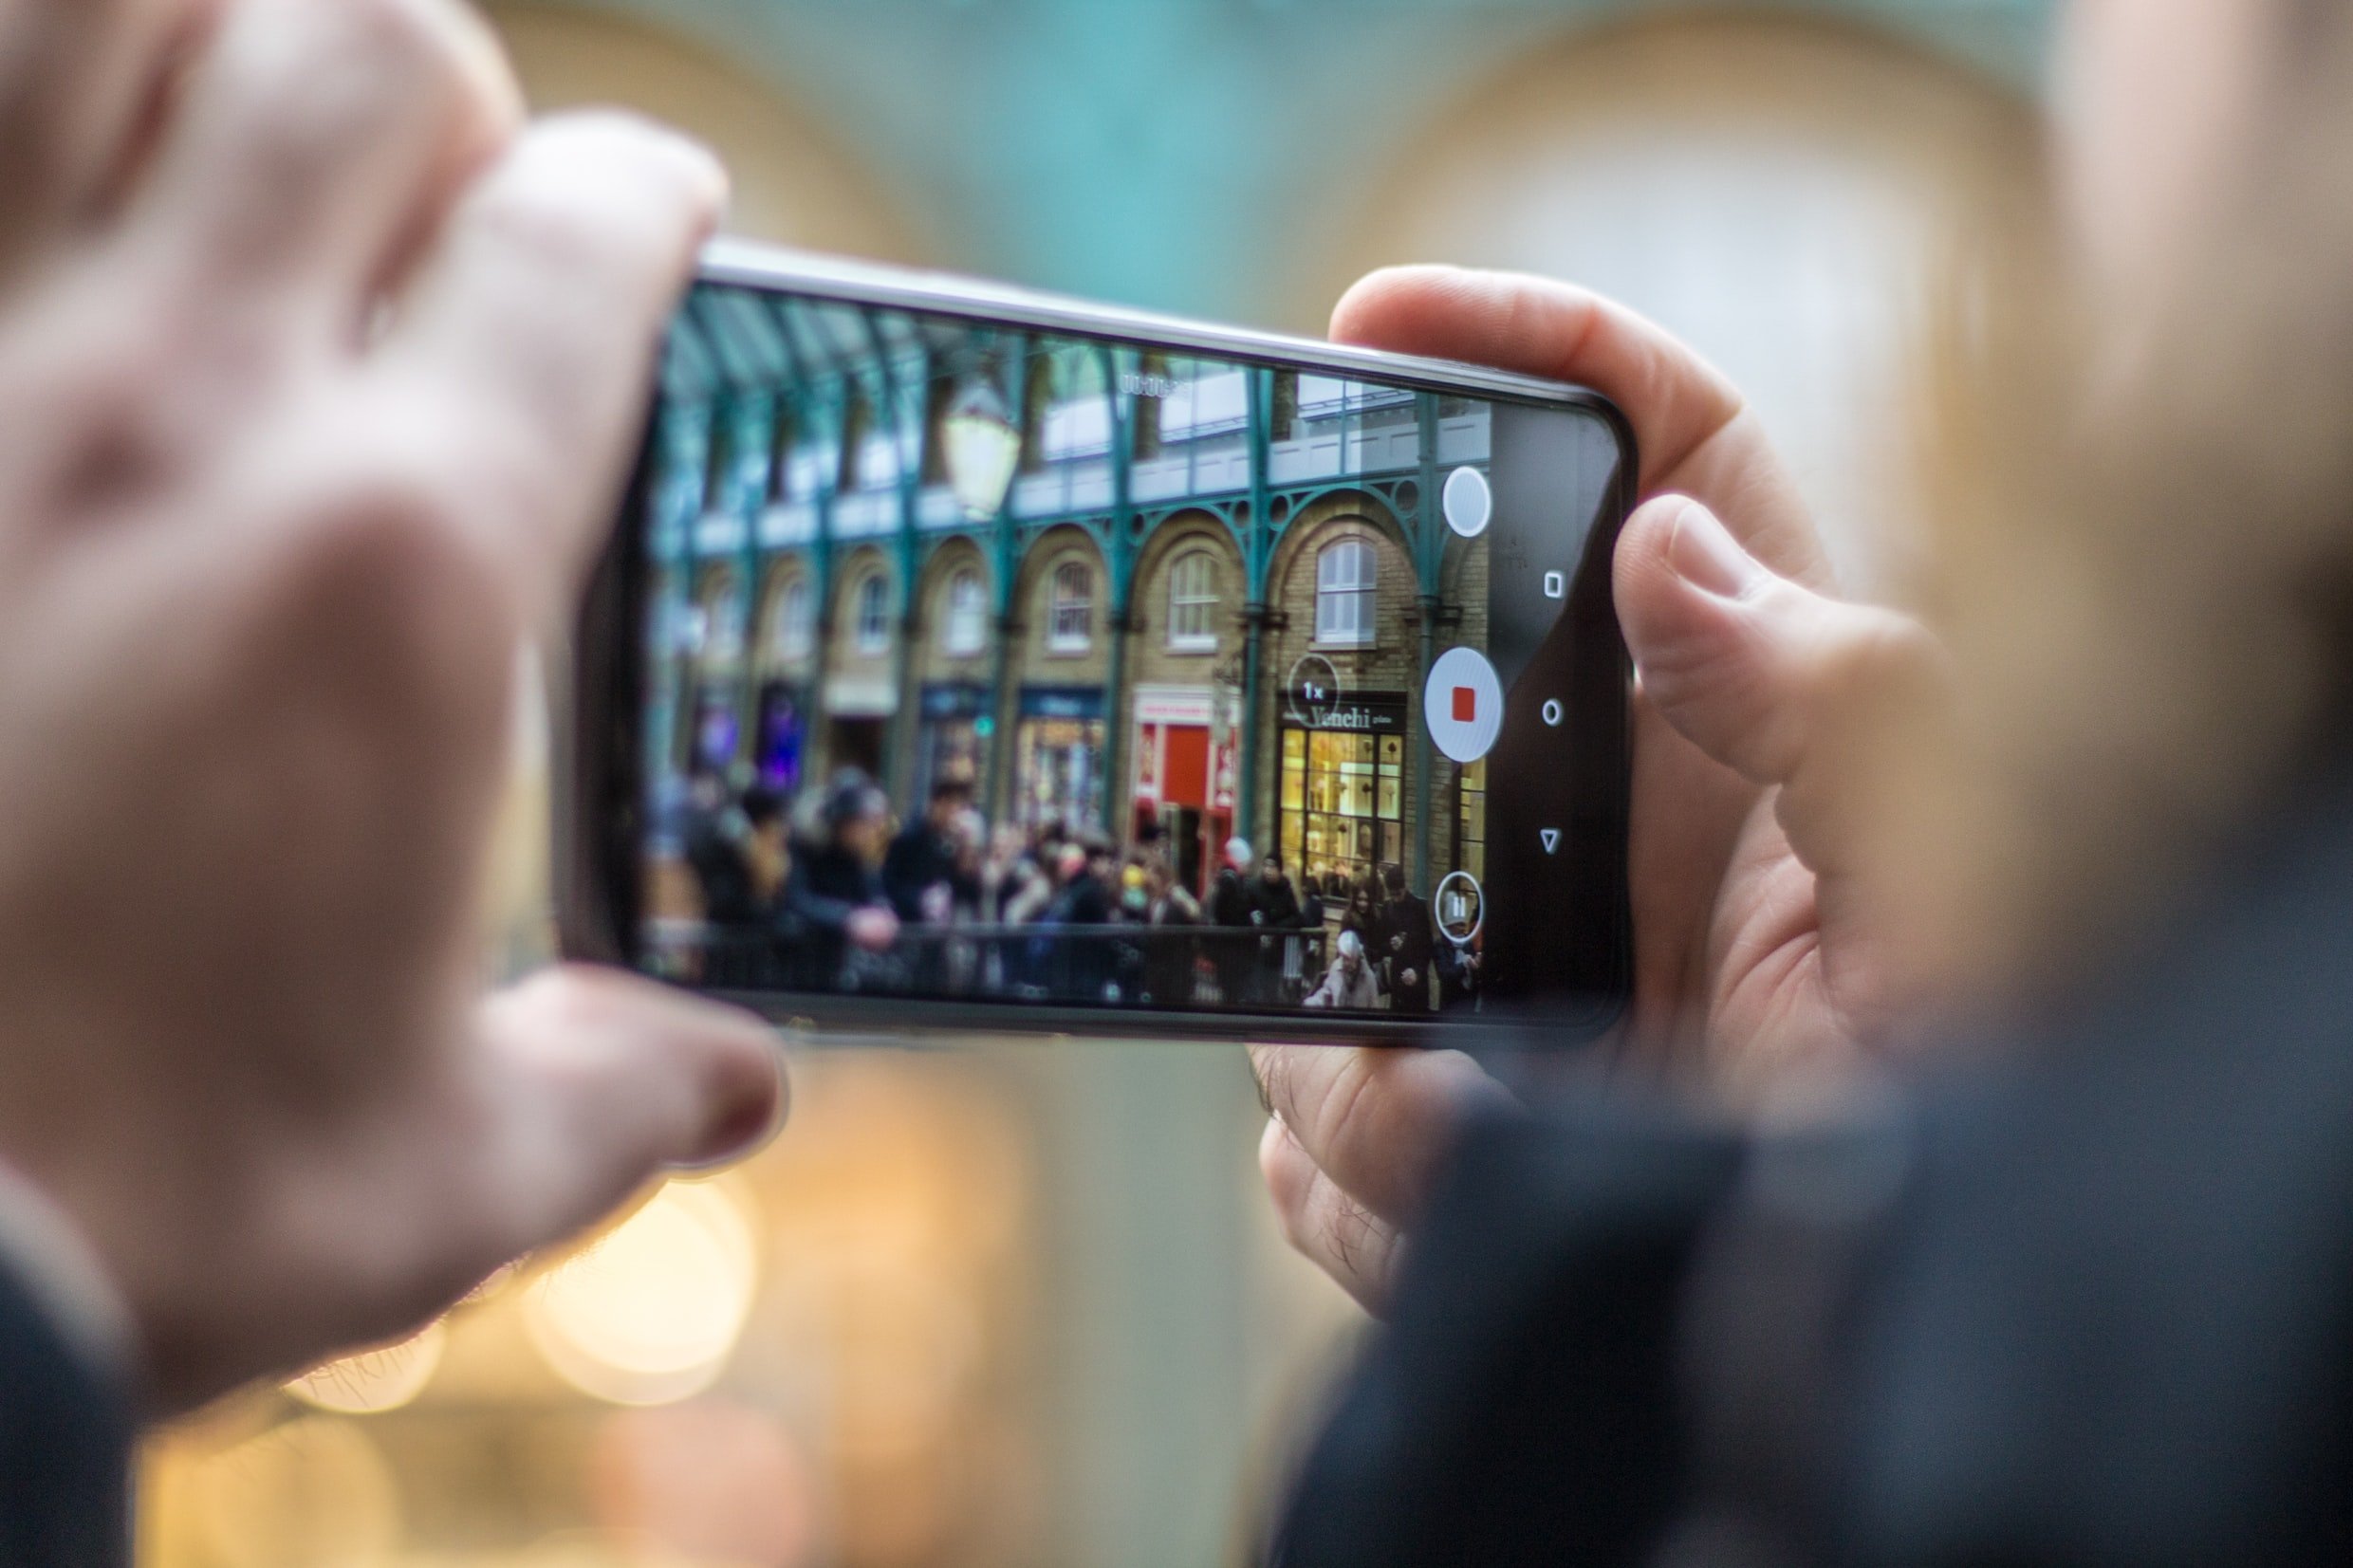
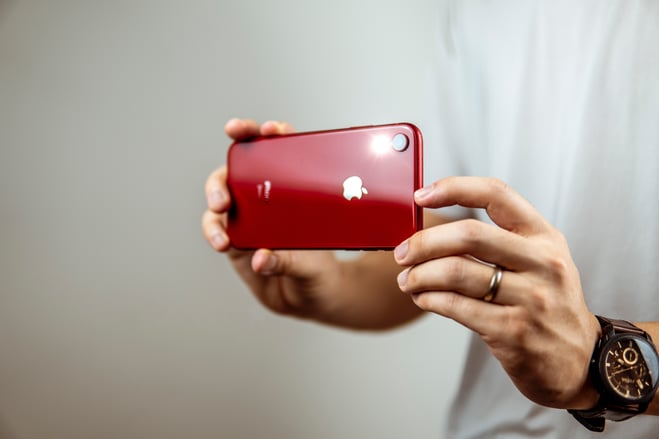
Did you know you’re likely carrying around a camera that can produce professional-looking photos and cinematic video? In fact, you don’t leave the house without it and you probably use it at least a few hours every day.
Yes, we’re talking about your smartphone.

Smartphone technology has come a long way in recent years, most notably the camera technology. Less people opt for digital cameras now that their phones are equipped with high-tech lenses. This handy camera that’s always within reach has become a viable option for real estate professionals and real estate photographers to use for both interior and exterior photos. And now, multifamily professionals can jump on the bandwagon.
Most recent smartphones on the market have quality built in lenses and sensors with enough resolution and settings options to create professional-looking shots that on-site teams can capture quickly and easily.
Not sure where to start when capturing apartment photos with your smartphone? Let’s break down some of the most important tips to know when learning how to take the best apartment photos with your smartphone.
Making a shot plan ahead of time can be very helpful. Following a detailed plan helps make sure you don’t miss any essential shots and you can get the entire space. Your list might look something like this:

In order to take the best apartment photos using your smartphone, it’s best to prepare your phone ahead of the photoshoot. What does that mean?
Your phone gets used a lot during the day so most likely the lens has some dirt, grim or fingertips on it. When there is even a small smudge or speck on your lens it can be difficult to capture really good photos, so be sure to clean it before taking any photos.
After you clean it you’ll want to also set the settings in your camera. Make sure your phone is set to the highest resolution that it allows.
You’ve planned out your shots and cleaned your phone, so what’s next?
Prepping the space. Taking the necessary time to prepare your space for a photoshoot is key to capturing the best photos. Declutter the room you are capturing - get rid of any books, old mail, cords, garbage dishes and anything else that you don’t want in the shot.
If you are capturing photos outside make sure to rake leaves, move and gardening supplies or bikes that may be in the way. Setting up the space ahead of time will ensure that the viewer focuses on your property rather than any background distractions.
Before taking the shots, walk around the room to find the best view points. Usually corners of the room are the best spots when taking the best apartment photos with your smartphone.
Your photos should show the relationships between rooms and the large elements of the space or property. Shooting from the corners allows you to make the space look as large as possible and helps the view better estimate the size of the room.
Along with composition it’s important to show the transitions from one area to another. This helps the photos look engaging and helps illustrate how the rooms are connected.
There are some key rules when it comes to real-estate photography in general that can help when learning how to take the best apartment photos with your smartphone. For example, all your vertical lines should be vertical.
What exactly does that mean?
Simply put, it means stay parallel and leveled. Edges and corners of walls, door frames and windows that have vertical sides need to truly be vertical. You can achieve this by aiming your camera perfectly horizontal, hold your camera straight aiming slightly up or down.
There are some exceptions to this rule, like if you are photographing a stairwell or shooting a room from a higher level or when photographing the exterior, sometimes you have to angle your camera upwards.
Before you actually use your smartphone, tap on the phone screen so the lighting adjusts automatically, tap somewhere between the darkest and lightest areas in the room so your phone can find the right light balance.
If you don't set the focus point yourself, your phone will choose which area of the scene to focus on, so it’s best to do it yourself to make sure it’s the right area.
If once your phone adjusts the focus area and you still aren’t happy with the exposure you can change it yourself by using the exposure slider on your phone.
A great tip, never use the flash. The images won't come out right when you use the flash. It’s always best to use natural light.
But how exactly do you achieve the perfect lighting?
Shooting in the morning or a few hours before dusk can really make a difference. Outdoor light isn’t as harsh during this time and your smartphone will pick up on that. If the day you are shooting doesn’t have great natural lighting you can always open all the windows and turn on the lights to help get that natural light look.

On your smartphone you can edit photos and add filters. This isn’t a bad thing. Filters are popular and have been around for a while. After selecting a filter that brings more life to your photo, but still captures the space in a realistic way you can use the editing tools to fine tune your photos before publishing.
Just make sure you don’t distort your photo to the point where it doesn’t even look at the space you are capturing.
Today, almost everyone has a smartphone and the cameras on the phones are only getting better. This is the perfect time to learn how to capture the best apartment photos using your smartphone.
If your community is looking to add to their digital content, contact our sales team today.
LCP360 is a National Digital Marketing company located in Chicago specializing in photography, virtual tours, 3D renderings, video animations, virtual staging, and floor plans. LCP360 offers multifamily, senior living, and many other real estate industries a creative and innovative way to showcase space. By combining the best technologies from web marketing and panoramic photography, LCP360 has developed a best-in-class virtual tour web application that lets renters virtually tour a property from any location.
Photography is worth a thousand words, or at least, it used to be. Today, it’s worth a 42% increase in click-through rate.
![How to Stage an Apartment Home Like a Pro [Infographic]](https://www.lcpmedia.com/hubfs/Retired%20LCP360%20Content/Retired%20LCP360%20Website%20Files/Images/Portfolio%20Images/0-full.jpg)
It may go without saying, but we'll say it anyway — amazing photography and videography go a long way when it comes to the real estate, multifamily...
Presenting your properties in the best light is crucial to attracting potential residents. However, weather can sometimes be a challenge, especially...